
Blog

torsion spring vs extension spring

Torsion Spring vs Extension Spring | Which is Better for Your Garage Door?

When it comes to garage door repairs or replacements, choosing the right type of spring is crucial for smooth operation and longevity. 

Torsion and extension springs are the two primary options, each with unique characteristics and advantages. Understanding the differences between them can help you make an informed decision about which one is better suited for your needs.

What are Torsion Springs?

Torsion springs, positioned horizontally above the garage door, store energy as they twist when the door closes and then release it as the door opens. This setup ensures a smoother and more controlled operation compared to extension springs. 

Notably, torsion springs boast superior durability and longevity over extension springs, making them a cost-effective option. Moreover, their parallel installation to the door tracks enhances safety by minimizing the risk of accidents or injuries.

What are Extension Springs?

Extension springs, positioned vertically on either side of the garage door, elongate and contract to aid the door's movement. Though simpler to install, they demand more upkeep than torsion springs. Despite being cost-effective, extension springs are vulnerable to wear and tear due to exposure, necessitating more frequent replacements.

Torsion Spring Vs Extension Spring

Feature

Torsion Spring

Extension Spring

Operation

Turns on a shaft

Expands and contracts

Extension

Partially extended

Fully extended

Durability

Sturdier, lasts longer (15,000-20,000 cycles)

Less sturdy, shorter lifespan (up to 10,000 cycles)

Motion

Controlled

Jerky

Adjustment

Less prone to needing adjustments

More prone to needing adjustments

Complexity

Less complex, fewer parts

More complex, more parts (sheaves, cables)

Maintenance

Easier to lubricate and maintain

More wear and tear on additional parts

Operator Wear

Less wear on the operator

More wear on the operator

Safety

Safer when it breaks (stays on the shaft)

More dangerous when it breaks (it can fly off)

Cost

More expensive

Less expensive

Which One is Better? — Torsion Spring Vs Extension Spring

While both types have their merits, torsion springs generally emerge as the victor due to their safety, durability, and quieter operation. However, there can be cases where extension springs make sense:

  • Tight budget: Extension springs offer a more affordable option if cost is a primary concern.
  • Limited headroom: Extension springs might be your only choice if space above the door is restricted.
  • DIY repairs: If you're comfortable with repairs, the simpler spring replacements of extension springs might appeal to you.

Conclusion

Consulting a professional garage door technician, such as Door Doctor, is always recommended to assess your specific needs and suggest the best spring system. They can also handle safe installation and ensure your door operates smoothly and safely for years.

Contact Door Doctor today to learn more about what’s better for your garage door. 

how to program a garage door opener to a car

How to Program a Garage Door Opener to a Car

Imagine pulling up to your garage door, pressing a button, and watching it magically open without the need for keys or remotes. Sounds like a dream, right? 

Well, it's not! 

With a little tech magic, you can program your car to automatically open your garage door, streamlining your arrival and departure routines. This blog post will guide you through the process, whether you're a tech whiz or a self-proclaimed "gadget newbie”.

Understanding Garage Door Openers

Before diving into programming, you must understand the basics of your garage door opener. Essentially, your garage door opener acts as the mechanical heart of your garage, responsible for effortlessly raising and lowering your door. While specific models may differ in features and button placements, the underlying principle remains consistent.

For example, with overhead door operators, the programming button layout at the back of the unit includes key elements: a Program/Set button, an open travel button, a close travel button, and two LED lights—one circular and one elongated. This configuration is crucial for facilitating the programming of your standard remote.

Det er viktig å konsultere lege før du tar Viagra pris for å unngå potensielle helsemessige komplikasjoner. Effekten av Viagra kan variere fra person til person.

How to Program the Standard Garage Door Opener Remote

To program a standard garage door opener remote:

  • Press and hold the Program button until an LED light illuminates. 
  • Depending on your model, you may need to press the Program button again to access the correct menu option for remote programming. 
  • Look for flashing LED lights, indicating that your opener is ready for programming. 
  • Press and release the button on the remote you want to use, repeating as necessary. This button will now operate the door.
El Kamagra generico tiene de droga citrato de medicacion comprar kamagra online en España su médico le recetó 50 mg de citrato de sildenifil genérico.

Programming Your Car to Garage Door Opener

Programming your vehicle's garage door opener follows a similar process to programming a remote. 

  • Press the Program/Set button on the back of your opener for two seconds. 
  • The round LED light will turn blue, and the long LED light will flash purple. 
  • Avoid holding the button, as this action could reset the entire programming, requiring the reprogramming of all your remotes.
  • Act swiftly and press the button on the remote control in your vehicle twice. Both LED lights will flash and then turn off, indicating that the vehicle's remote has been successfully programmed. 

This task may require two people for efficient completion.

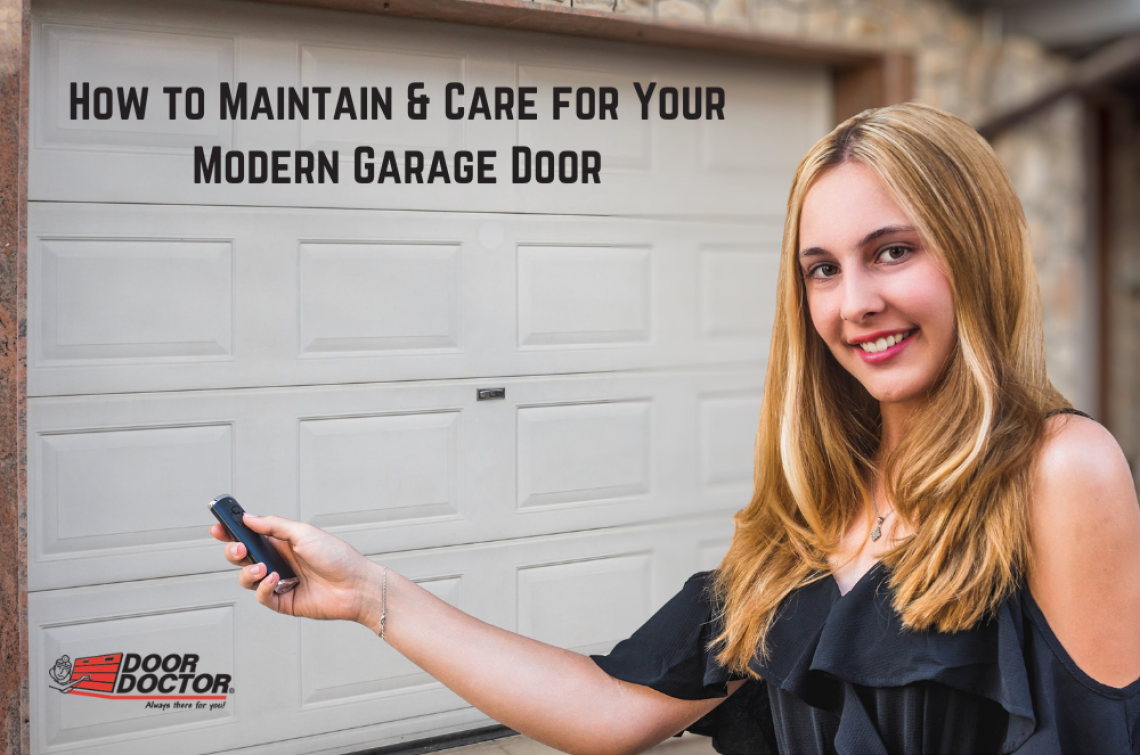
Once programmed, use the vehicle's opener, and the door should lift as expected.

Conclusion

For assistance with setting and pairing your garage door opener and remotes, including those in your vehicle, rely on the expertise of Door Doctor. Our commitment to customer service extends beyond the initial sale.

Contact us today for assistance.

How to Replace a Garage Door Spring

How to Replace a Garage Door Spring? | Essential Steps & Tips

Think of garage door springs as muscles for your heavy door. They counter its weight, letting you open and close it smoothly, manually or with an opener. But like any muscle, these high-tension steel ones get tired over time and lose their lift. Replacing them keeps your door swinging smoothly.

While replacing these springs is possible for brave DIYers, caution is key! Springs under tension can be dangerous. Consider calling a pro unless you're a skilled (and very careful) handyman with the right safety gear and tools. Trust us, your safety is worth more than the DIY savings.

Remember: Professionals handle these tough guys safely and efficiently, keeping your garage door happy and your fingers safe.

What are the Various Types of Garage Door Springs?

Selecting the correct replacement springs for your garage door is crucial for safe and optimal operation. There are two main types used in residential homes: torsion and extension. Understanding their differences and matching them accurately is key.

Torsion Springs

  • Appearance: Heavy-duty, coiled springs mounted around a metal rod above the door opening.
  • Function: Counterbalance the door's weight by twisting on the rod, creating tension.
  • Suitability: Typically for heavier garage doors.
De bruisende stad verbergt vele geheimen, maar niets kan de impact van Viagra kopen online evenaren. In de rustige straatjes van het dorp fluisterden.

Extension Springs

  • Appearance: Long, lighter-weight springs positioned above the horizontal tracks, running perpendicular to the door.
  • Function: Counterbalance the door's weight by stretching out using cables and pulleys.
  • Suitability: Often used for lighter garage doors.

Pros & Cons of DIY Spring Replacement

Pros

Cons

Keeps the money in your pocket, not someone else's.

Prepare to dedicate some serious hours; it's not a five-minute job

Become a DIY master and impress everyone.

Be cautious; some projects can bite back.

Get that "I did it!" feeling, it's addictive.

It's not a straight line; get ready for challenges.

Nella tranquilla campagna toscana, gli anziani contadini discutevano dell'efficacia del Viagra senza ricetta online nei confronti della disfunzione erettile.

Replacing Extension Garage Door Springs

Sick of dealing with a noisy, slow garage door? Upgrading worn-out extension springs can solve the problem! Here's a quick rundown:

Get the Right Springs

  • Buy springs that match your door's height (usually 7ft or 8ft).
  • Consider replacing cables, pulleys, and brackets if they're worn.

Prepare for Safety

  • Fully open the door and secure tracks with C-clamps or a brace.
  • Unplug the opener to avoid accidental activation.

Remove the Old Springs

  • Start with the farthest spring from the door.
  • Unbolt it from the bracket, disconnect the lift cable, and remove the pulley.
  • Repeat for the other side and disconnect the safety cables.

Install the New Springs

  • Begin with the safety cable, thread it through the spring, and attach it to the brackets.
  • Connect the lift cable to the spring end and track bracket in a loop pattern.
  • Applying slight tension (1-2 inches) when attaching the cable to stretch the spring.
  • Repeat for the other side.

Finish and Test

  • Lubricate the springs with garage door spray.
  • Reconnect the opener, remove the clamps, and test the door's operation.
  • Adjust the lift power if needed for stronger springs.

Replacing Torsion Garage Door Springs

Safety Measures

  • Lock the garage door and disconnect the opener.
  • Secure door tracks with C-clamps to prevent accidental opening.
  • Use a sturdy stepladder for safe access.

Unloading the Springs

  • Choose the correct winding bar for the spring opening.
  • Insert and tighten setscrews gradually to release tension.
  • Slide old springs down the bar and secure it with pliers.

Removing Old Springs

  • Disconnect springs from the center bracket using wrenches.
  • Secure the bar with pliers and disconnect the cable from the door bracket.
  • Loosen the drum setscrews and remove the old spring.

Installing New Springs

  • Slide new springs onto the bar bolt to the center bracket.
  • Reconnect cables to their brackets and secure them in the drums.
  • Tighten drum setscrews to eliminate cable slack.

Loading the Springs

  • Follow the manufacturer's instructions for the twists required.
  • Twist the spring upwards using two winding bars.
  • Tap the winding bar with a hammer to extend the spring slightly.
  • Tighten setscrews to secure the spring without over-tightening.

Finishing Touches

  • Lubricate springs with garage door spray.
  • Remove clamps, reconnect opener, and test door operation.
  • Adjust spring tension if the door doesn't open or close fully.

Replacing garage door springs isn’t a DIY task; it can be dangerous. Seek professional help if unsure.

Conclusion

By following these steps and prioritizing safety, you can successfully replace your garage door spring and get your door functioning smoothly again. However, if the project seems overwhelming or safety concerns arise, don't hesitate to seek help from the professionals of Door Doctor. Remember, peace of mind and avoiding potential injuries are priceless.

Contact us today!

What to Do If Your Garage Door is Crooked

Troubleshooting Tips | What to Do If Your Garage Door is Crooked

Imagine this scenario: you pull into your driveway after a long day, eager to park your car and relax. However, instead of the familiar and welcoming sight, you're confronted with an unsettling sight - your once-proud garage door is noticeably crooked. It's not merely an eyesore; a misaligned garage door disrupts the overall visual harmony of your home and, more importantly, raises safety concerns.

Before hastily reaching out to professionals, there's no need to lose hope! Many issues causing a crooked garage door have surprisingly straightforward solutions that you can address on your own. Like countless others who have encountered a leaning or uneven door, you might discover that the remedy is within your reach.

With a bit of troubleshooting and some fundamental knowledge, you can restore your garage door back to perfect alignment and regain your peace of mind.

Common Causes of a Crooked Garage Door

Before delving into potential solutions, it's crucial to understand the possible reasons behind your crooked garage door. Several factors can contribute to this issue:

Imbalanced Springs: Imbalanced springs are the most common culprit for a crooked garage door. If one side of the door has a worn-out or broken spring, it can result in uneven lifting.

Misaligned Tracks: Garage doors operate within a system of tracks, and if these tracks become misaligned, the door may not move smoothly, leading to a crooked appearance.

Worn-out Rollers: Over time, the rollers responsible for guiding the door along the tracks can wear out, causing the door to move unevenly.

Tension Cable Issues: The tension cables located on either side of the door play a crucial role in maintaining balance. If these cables are loose, damaged, or broken, the door may become crooked.

What to Do If Your Garage Door is Crooked

Identify the Lean

To start, take a moment to assess the situation. Is the entire door tilted to one side, or is it uneven at the bottom? This initial observation can provide valuable clues to narrow down the potential cause of the issue.

Check the Tracks

Garage doors function within a track system, and misaligned tracks often lead to crookedness. Examine the tracks carefully for any signs of bends, kinks, or loose brackets that could be causing the door to deviate from its proper path. If you spot minor misalignments, you can make gentle adjustments using the appropriate tools (refer to your garage door manual or consider professional assistance for major adjustments).

Inspect the Rollers

Worn-out or damaged rollers can contribute to uneven movement. To inspect them, run your hand along the rollers, checking for cracks, chips, or excessive wear. If you identify any issues with the rollers, it's essential to replace them with new ones as soon as possible.

Balance the Springs

Garage doors depend on torsion springs to counterbalance their weight and ensure smooth operation. When these springs become imbalanced, it can lead to the door to tilting to one side. However, it's crucial to understand that adjusting spring tension can be extremely dangerous and should only be undertaken by a qualified technician. If you suspect any issues with the springs, it's essential to seek professional help immediately for your safety and proper resolution.

Koupit Viagra bez receptu online koupit Viagra. Co je Viagra a může vyléčit impotenci? Jak víte, impotence je v dnešní společnosti běžným problémem mužů.

Examine the Cables

The cables play a critical role by connecting the springs to the bottom brackets of the door. If these cables are broken or loose cables, they can result in uneven movement and a crooked door. If you happen to observe any frayed or broken cables, it's imperative that you refrain from attempting any DIY fixes. Instead, it's highly advisable to promptly contact a professional for immediate cable replacement. This ensures both your safety and the correct resolution of the issue.

Lubricate Moving Parts

Routine lubrication of all moving components, such as rollers, hinges, and tracks, is essential to prevent future issues and maintain smooth operation. Utilize a silicone-based lubricant specifically formulated for garage doors. This practice not only enhances the longevity of your garage door but also ensures its trouble-free functioning.

Suomessa voit ostaa Viagra ilman reseptiä verkkoapteekista ja alkuperäistä Viagra ilman reseptiä. Kaikki tilaukset toimitetaan kotiin huomaamattomassa pakkauksessa.

When to Call a Professional

While you might feel comfortable making some minor adjustments, it's essential to bear in mind that garage doors are intricate and feature high-tension springs. If you are uncertain about the root cause of the problem, lack the required tools or expertise, or encounter potentially hazardous situations like broken springs or loose cables, always prioritize safety.

In such cases, it is highly recommended to contact a qualified garage door technician. These professionals possess the necessary experience and equipment to accurately diagnose and address the issue, guaranteeing the safe and efficient operation of your garage door. Your well-being should always be the top priority when dealing with garage door problems.

Contact Door Doctor Today!

A crooked garage door can indeed be troublesome, but by diligently following these troubleshooting tips, you can pinpoint the potential cause and take the necessary measures. Always remember, when in doubt, prioritize safety first! 

If you ever find yourself uncertain or facing complex issues, don't hesitate to reach out to the experts at Door Doctor. They can ensure that your garage door is not only fixed correctly but also operating safely. Your peace of mind and safety should always come first.

Insulate my Garage

How do I Insulate my Garage? | A Beginner's Guide

Are you dreaming of converting your cold garage into a space you can use throughout the year? Whether you have plans for a home gym, a workshop, or even a guest room, insulation is the essential element to ensure comfort and energy efficiency.

However, for many homeowners, the query 'How can I insulate my garage?' can seem overwhelming.

Benefits of Garage Door Insulation

Before delving into the details, let's explore the benefits of insulating your garage:


  • Enhanced Comfort: Bid farewell to extreme temperatures! Insulation regulates the garage's climate, providing year-round comfort, regardless of external weather conditions
  • Energy Efficiency: By preventing heat loss during winter and heat gain in summer, insulation significantly reduces your energy expenses, leading to long-term savings.
  • Noise Control: Insulation acts as a sound barrier, effectively dampening noise originating from the garage and preventing it from disturbing your living space.
  • Increased Property Value: An insulated garage contributes to enhancing the overall value of your property, making it more appealing to potential buyers.

Types of Garage Door Insulation

Insulation Type Pros Cons
Rigid Foam

High R-value, easy to install, good noise reduction

Not breathable, can attract pests

Fiberglass

Affordable, DIY-friendly, readily available

Skin and lung irritants are fire hazards if not installed properly

Radiant Barriers

Reflects heat, reduces cooling costs

Not effective in cold climates, doesn't insulate against heat loss

Cellulose

Fire-resistant, eco-friendly

Expensive, can lose effectiveness over time

Spray Foam

High R-value, excellent air sealing, pest-resistant

Very expensive, professional installation required, can shrink

Posso comprar Levitra online sem receita médica, comprar Levitra sem receita médica. O Levitra é considerado uma medicação de prescrição médica na Europa.


How to Insulate Your Garage Door

To initiate the insulation process for your garage door, start by identifying its construction material, which could be steel, wood frame-and-panel, or flat. Customize your insulation approach to align with the specific door type, ensuring optimal results.

Determine Door Construction Material: Steel, Wood Frame-and-Panel, or Flat

Identify the material your garage door is made of, whether it's constructed with steel, designed with a wood frame-and-panel structure, or is a flat door. This information will serve as a guide for determining the appropriate insulation method.

Insulating Steel Garage Doors: Flexible Insulation or Pre-cut Foam Board

When dealing with steel garage doors, pay particular attention to the frames surrounding the panels. You have two insulation options:

  1. Utilize flexible insulation and insert it into the frames, making sure it fits snugly.
  2. Alternatively, consider using pre-cut foam board insulation, and insert it into the frames to ensure sufficient coverage.
Η αγορά Viagra χωρις συνταγη στην Ελλάδα αποτελεί σημαντική διαδικασία για όσους άνδρες αντιμετωπίζουν προβλήματα στη σεξουαλική τους ζωή και επιθυμούν μια λύση.

Insulating Wood Frame-and-Panel Garage Doors: Stiff Insulation in Recesses

When working with wood frame-and-panel garage doors, cut rigid insulation to match the dimensions of the recesses between the door frames. Secure the insulation in place to guarantee full coverage and achieve optimal insulation.

Insulating Flat Garage Doors: Utilize Foam Board

Flat garage doors are most effectively insulated using foam board. Simply attach the insulation directly to the door surface using tape or glue.  This method creates a seamless and highly effective barrier against temperature fluctuations.

Important Consideration: Added Weight

It's important to bearin mind that adding insulation to your garage door will increase its weight. This can potentially affect the door's balance and tension, necessitating adjustments. Assess the door's functionality, and if required, consider replacing the springs to maintain the correct tension and ensure proper door closure.

Additional Tips for Insulating Your Garage Door

  • Ensure precise measurements and cuts of insulation materials to achieve a proper fit.
  • Utilize suitable adhesives, tapes, or fasteners to secure the insulation in place.
  • Take into account the insulation's R-value to assess its effectiveness in assess thermal resistance.
  • Regularly inspect the garage door after insulation to promptly address any issues that may arise.

Conclusion

Following these steps, you can certainly insulate your garage door on your own; however, it’s advisable to consider professional assistance for the best results. By doing so, you can enjoy the benefits of a well-insulated space, which include lower energy bills and a cozy retreat during extreme weather conditions.

Contact Door Doctor today to get your answer to “How do I insulate my garage door?”
English