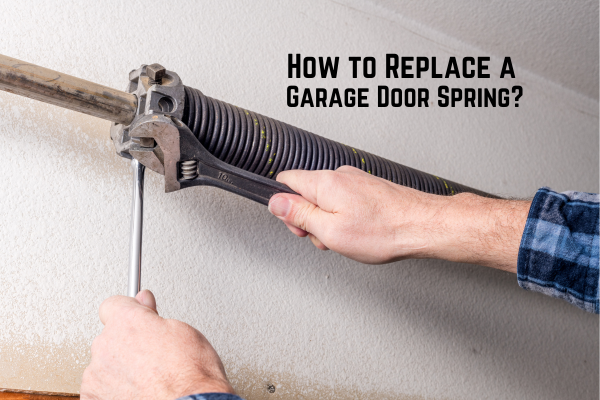
How to Replace a Garage Door Spring? | Essential Steps & Tips
Think of garage door springs as muscles for your heavy door. They counter its weight, letting you open and close it smoothly, manually or with an opener. But like any muscle, these high-tension steel ones get tired over time and lose their lift. Replacing them keeps your door swinging smoothly.
While replacing these springs is possible for brave DIYers, caution is key! Springs under tension can be dangerous. Consider calling a pro unless you're a skilled (and very careful) handyman with the right safety gear and tools. Trust us, your safety is worth more than the DIY savings.
Remember: Professionals handle these tough guys safely and efficiently, keeping your garage door happy and your fingers safe.
What are the Various Types of Garage Door Springs?
Selecting the correct replacement springs for your garage door is crucial for safe and optimal operation. There are two main types used in residential homes: torsion and extension. Understanding their differences and matching them accurately is key.
Torsion Springs
- Appearance: Heavy-duty, coiled springs mounted around a metal rod above the door opening.
- Function: Counterbalance the door's weight by twisting on the rod, creating tension.
- Suitability: Typically for heavier garage doors.
Extension Springs
- Appearance: Long, lighter-weight springs positioned above the horizontal tracks, running perpendicular to the door.
- Function: Counterbalance the door's weight by stretching out using cables and pulleys.
- Suitability: Often used for lighter garage doors.
Pros & Cons of DIY Spring Replacement
|
Pros |
Cons |
|
Keeps the money in your pocket, not someone else's. |
Prepare to dedicate some serious hours; it's not a five-minute job |
|
Become a DIY master and impress everyone. |
Be cautious; some projects can bite back. |
|
Get that "I did it!" feeling, it's addictive. |
It's not a straight line; get ready for challenges. |
Replacing Extension Garage Door Springs
Sick of dealing with a noisy, slow garage door? Upgrading worn-out extension springs can solve the problem! Here's a quick rundown:
Get the Right Springs
- Buy springs that match your door's height (usually 7ft or 8ft).
- Consider replacing cables, pulleys, and brackets if they're worn.
Prepare for Safety
- Fully open the door and secure tracks with C-clamps or a brace.
- Unplug the opener to avoid accidental activation.
Remove the Old Springs
- Start with the farthest spring from the door.
- Unbolt it from the bracket, disconnect the lift cable, and remove the pulley.
- Repeat for the other side and disconnect the safety cables.
Install the New Springs
- Begin with the safety cable, thread it through the spring, and attach it to the brackets.
- Connect the lift cable to the spring end and track bracket in a loop pattern.
- Applying slight tension (1-2 inches) when attaching the cable to stretch the spring.
- Repeat for the other side.
Finish and Test
- Lubricate the springs with garage door spray.
- Reconnect the opener, remove the clamps, and test the door's operation.
- Adjust the lift power if needed for stronger springs.
Replacing Torsion Garage Door Springs
Safety Measures
- Lock the garage door and disconnect the opener.
- Secure door tracks with C-clamps to prevent accidental opening.
- Use a sturdy stepladder for safe access.
Unloading the Springs
- Choose the correct winding bar for the spring opening.
- Insert and tighten setscrews gradually to release tension.
- Slide old springs down the bar and secure it with pliers.
Removing Old Springs
- Disconnect springs from the center bracket using wrenches.
- Secure the bar with pliers and disconnect the cable from the door bracket.
- Loosen the drum setscrews and remove the old spring.
Installing New Springs
- Slide new springs onto the bar bolt to the center bracket.
- Reconnect cables to their brackets and secure them in the drums.
- Tighten drum setscrews to eliminate cable slack.
Loading the Springs
- Follow the manufacturer's instructions for the twists required.
- Twist the spring upwards using two winding bars.
- Tap the winding bar with a hammer to extend the spring slightly.
- Tighten setscrews to secure the spring without over-tightening.
Finishing Touches
- Lubricate springs with garage door spray.
- Remove clamps, reconnect opener, and test door operation.
- Adjust spring tension if the door doesn't open or close fully.
Replacing garage door springs isn’t a DIY task; it can be dangerous. Seek professional help if unsure.
Conclusion
By following these steps and prioritizing safety, you can successfully replace your garage door spring and get your door functioning smoothly again. However, if the project seems overwhelming or safety concerns arise, don't hesitate to seek help from the professionals of Door Doctor. Remember, peace of mind and avoiding potential injuries are priceless.


